Google is currently beta testing displaying image licensing – which means it’s a good time for photographers to check their workflows and ensure that images will have the correct metadata for this feature.
Adding Metadata
There are two ways metadata can be added:
- As structured data
- As IPTC photo metadata
IPTC Photo Metadata
Adding information as IPTC photo metadata is what I’d recommend for professional photographers.
It’s easy to add this in Adobe Lightroom and can be done on import or export. Once you’ve set up the IPTC photo metadata properly, it should seamlessly fit into your workflow.
Time needed: 10 minutes
How to add IPTC Photo Metadata in Adobe Lightroom
- Click the Library Module
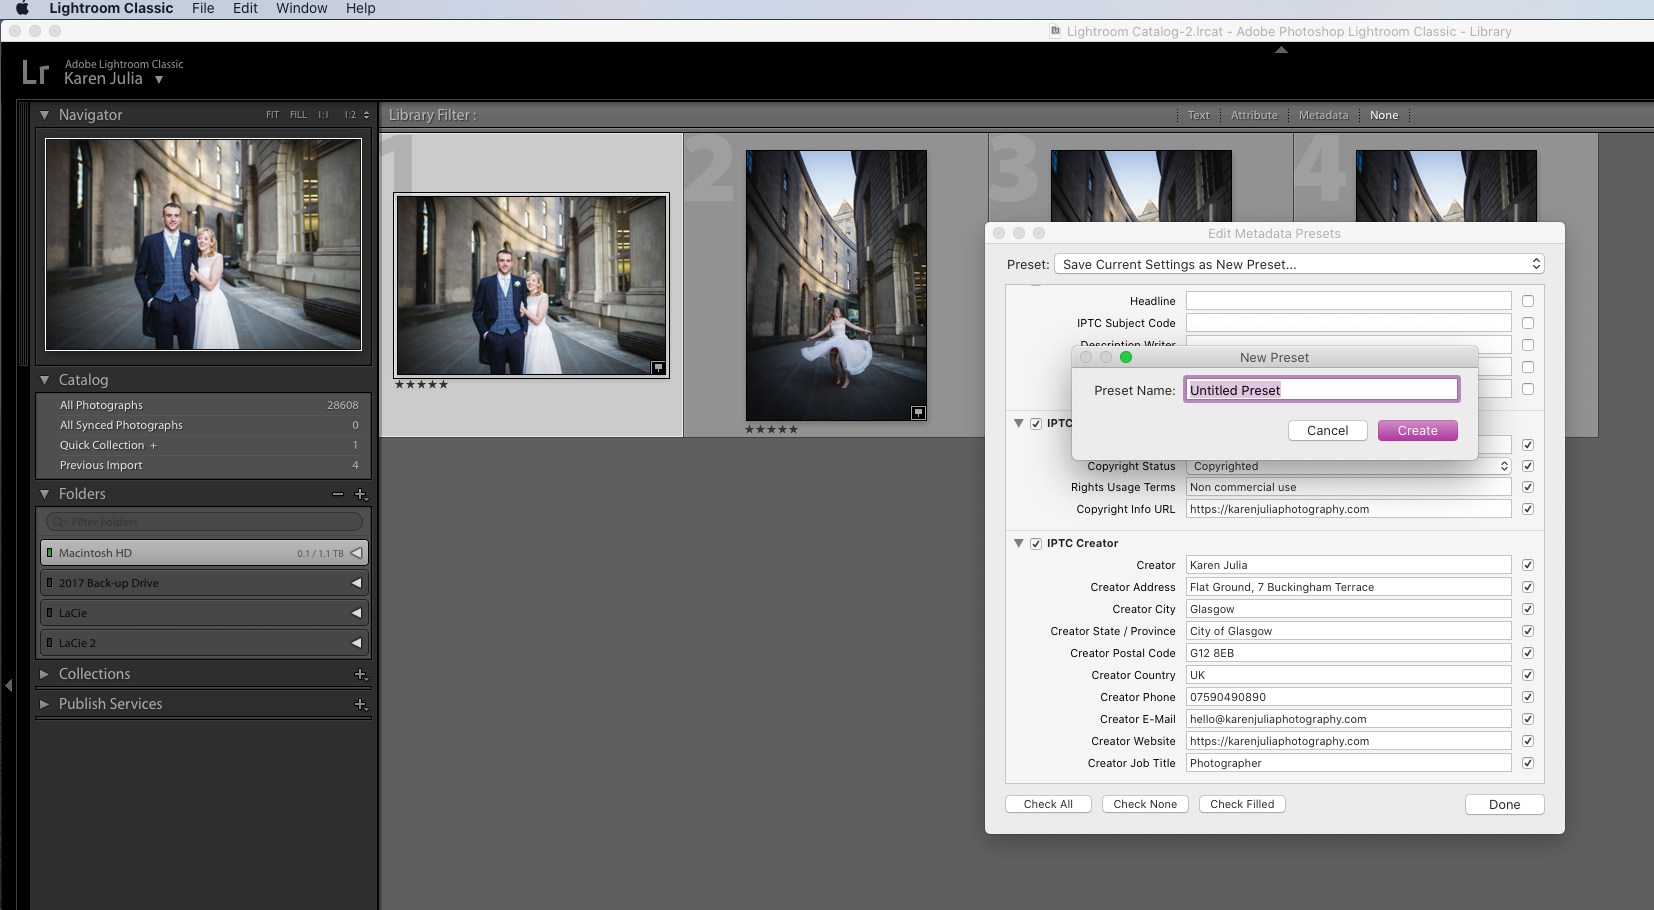
In the Library module, you’ll be able to see the word ‘Metadata’ in the top menu. Hover over this, and when the drop-down list appears, navigate to ‘Edit Metadata Presets’.
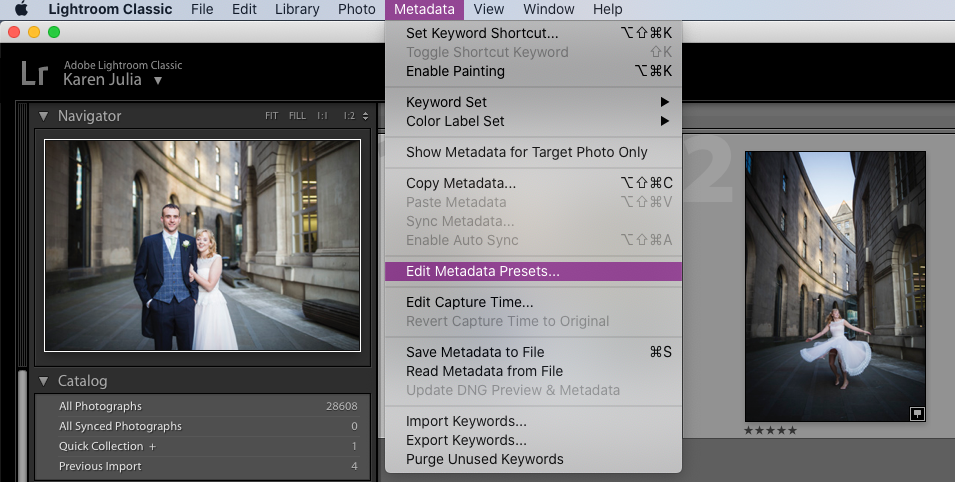
- Click ‘Edit Metadata Presets’
When the box opens up, check you have license data in the appropriate boxes in the ‘IPTC Copyright section’ and ‘IPTC Creator’ section. If these are blank, add the required information to the two sections.
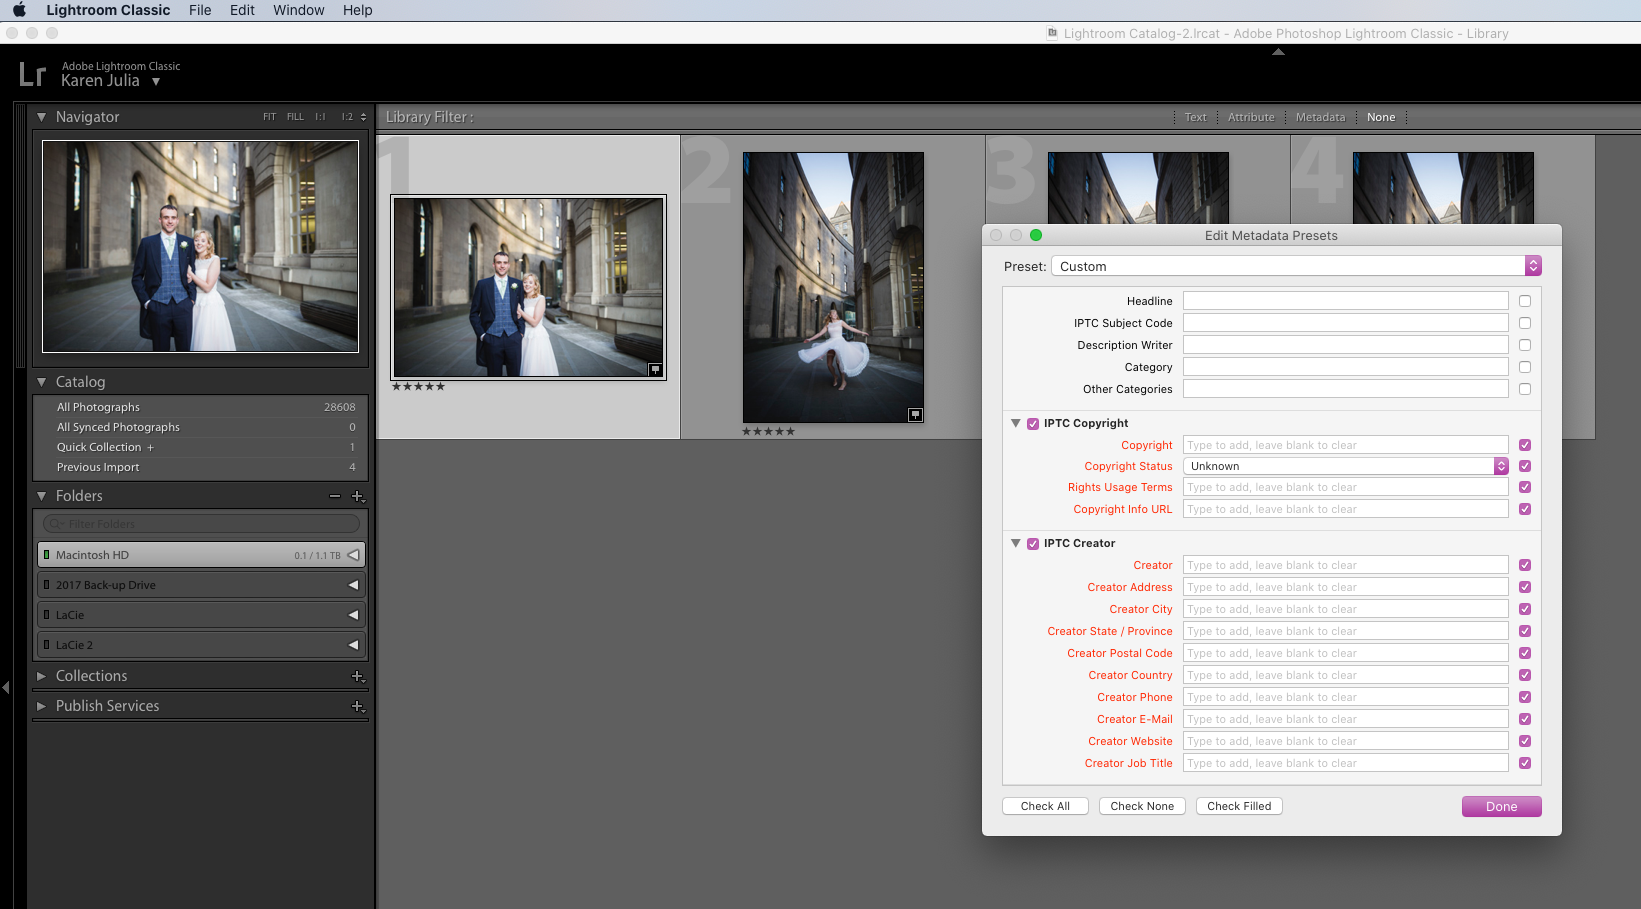
- Add Required IPTC Copyright Photo Metadata
Add the copyright owners’ name, select whether the image is copyrighted or not, add a few words about usage terms, and then add the copyright info URL. I prefer to add my homepage as I have copyright terms in the footer of my website, but you can choose to add a specific URL to a page that has information about this. It’s not essential to complete the IPTC Creator section for licensing, but I like to fill that out as well.
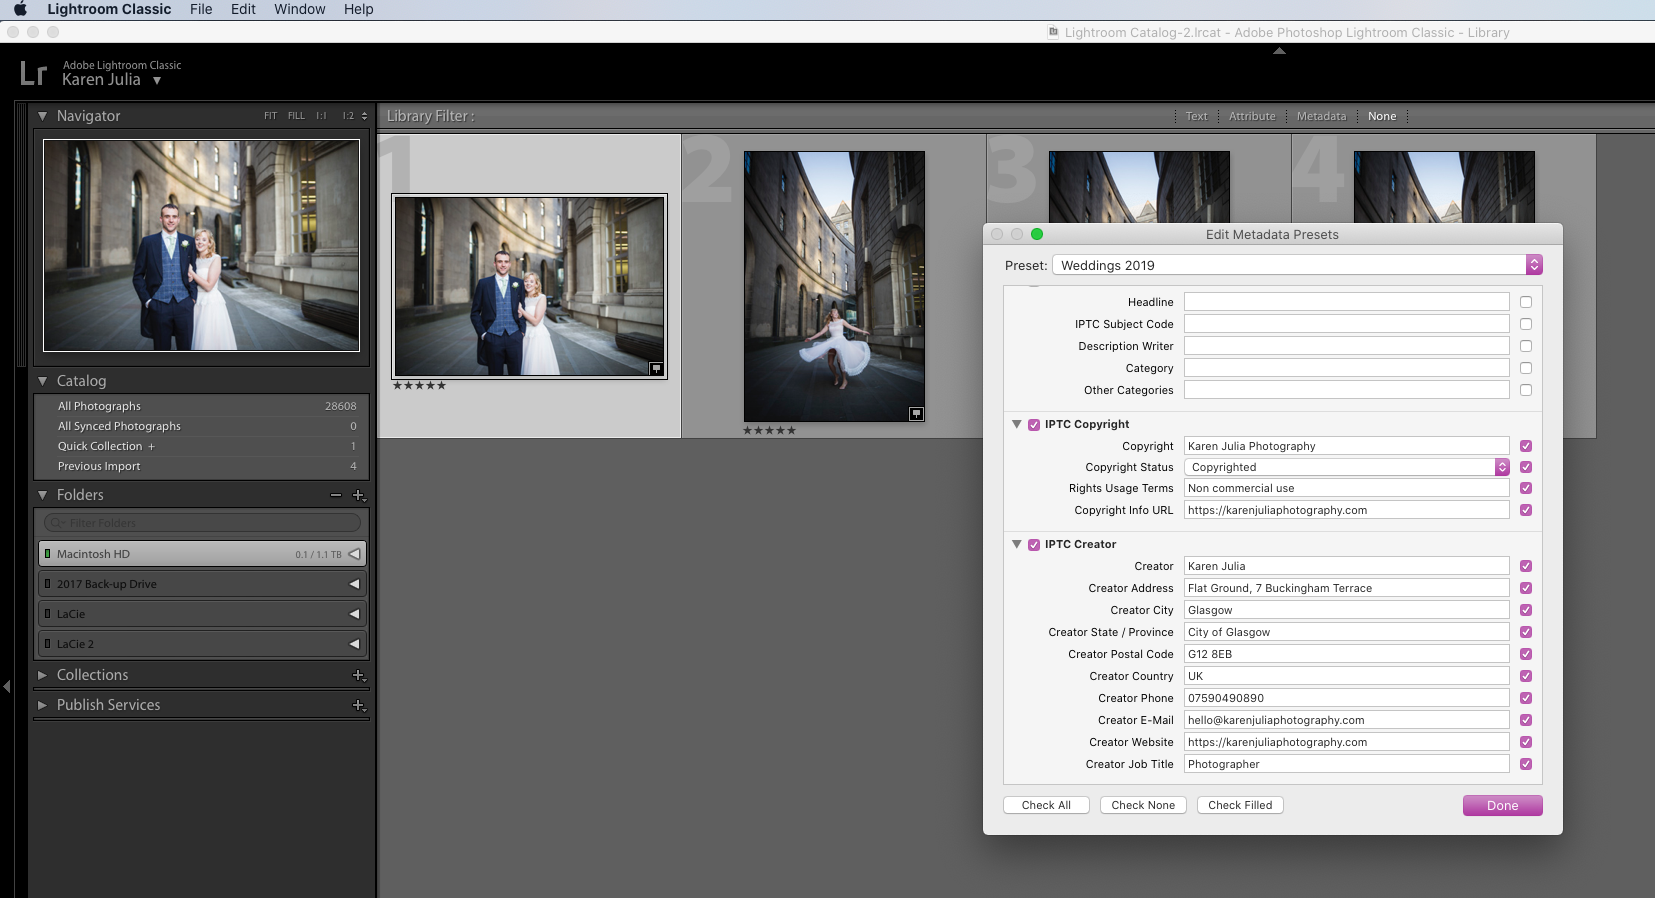
- Save Your Updated Preset
Click the dropdown menu next to ‘preset’ at the top of the popup, and choose the ‘save as new preset’ option. I like to update this every year so that it always has the latest information. I like to name it by year, so I named this updated preset ‘Weddings 2020’. You may choose to have different presets for different genres of photography that you specialise in. Click the ‘create’ button to save your new preset.
- How to Apply the new Preset on Import
When you click ‘import’ in the Library module, over on the right you’ll see some choices for setting to be applied on import. Choose the metadata preset you just created, and you’re done! This should stay the same for future imports now that it’s been set up.
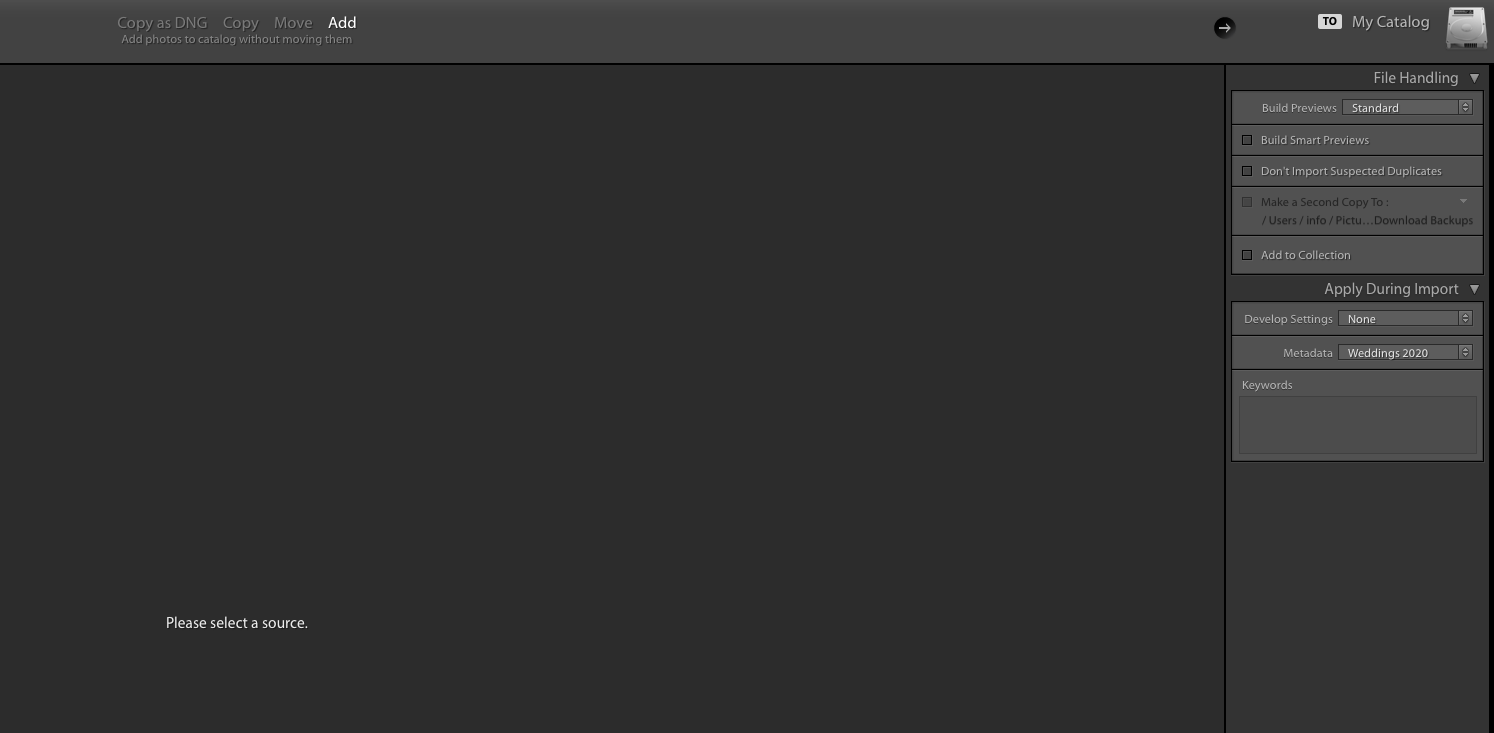
Image Optimisation Tip!
When using some image optimisers, photo metadata can be stripped out to reduce load time and improve speed.
Check settings in popular image optimiser plugins like Shortpixel to ensure image metadata is maintained and not removed.
Resources
Google Article: https://developers.google.com/search/docs/data-types/image-license-metadata
Search Engine Land: https://searchengineland.com/google-adds-new-image-license-metadata-for-licensable-image-label-329522
Google best practice guidelines for images: https://support.google.com/webmasters/answer/114016?hl=en
