Image SEO Optimization can make a big difference with the online presence of a website, and enable users to find the style of photos that they connect with. This is especially important in the photography industry, where consumers are not necessarily using industry jargon words like ‘lifestyle’ and ‘photojournalistic’. Enabling photos to be found easily, and to have the opportunity to be shown in Google image search, then helps ensure users can find content that is visually appealing to them.
There’s lots of small steps that add up to create powerful opportunities to increase your visibility across the web
Image SEO is a huge area with lots of small steps that add up to create powerful opportunities to be found online and increase brand visibility. Optimizing images on your site is so much more than just adding alt text and making them smaller. In this image SEO tips guide, I cover a range of optimization steps you can take to help achieve the best possible performance of your website in search engines.
Optimizing photos to be shown in both the regular search engine results pages and in image search can be divided into 3 main stages; Image preparation, on-page optimization, and analyzing performance.
Table of Contents
Image SEO Optimization: Preparation
1. Adding Metadata at Image Import
The photographers I work with are often surprised to find the image SEO optimization starts before any editing. When you import your photos into Adobe Lightroom, there’s an option to select which metadata preset you’d like to attach to the import.
If you’ve not already set up your metadata preset, now is the perfect time to do that. Google is able to identify metadata in the image EXIF file, and excluding this will mean that you don’t qualify to have copyright or license information shown in search results. There’s a step-by-step guide on my ‘how to add image license metadata‘ blog post, The short video tutorial below shows you what you need to do.
Note: If you’re reading this and have a huge blog featuring lots of images then don’t panic! You can add structured data instead (see step 14 below)
2. Image Geo-Tagging
Before the export stage, photos should be geo-tagged with the correct location. This adds valuable information to the image metadata so that Google can see where the image was located and especially for wedding photography SEO, is an essential step in optimizing images. Providing search engines with valuable data like this helps them provide a better user experience.
3. File Naming
Within WordPress, image file names will form part of the image URL, so what you name your file will influence how well Google is able to understand it.
Image files should be exported with descriptive and relevant names that are as short as possible, whilst still making sense. Image file names that are unoptimized and either couple names or the original filenames will limit the potential to rank in both regular search engine results pages and in image search. For wedding photos, I recommend you choose the wedding venue name to include in the file name, that way it will appear in the image URLs.
If you’ve already got a set of photos from this venue, choose another aspect of the day, maybe the styling, the season, or any dominant theme of the wedding day.
When naming your photo, it’s worth thinking about the blog the photo will be featured on and naming it in a way that aligns with the main focus keyword, if there is one. This will help search engines understand the context of the page better.
If you’d like to learn more, check out our detailed blog on How to name your images.
4. Image File Size
The size of your photos is going to have a big influence on the user experience of your website. If the page is too slow to load, the bounce rate will be higher and this will have a negative impact on rankings as well as conversion.
The sale of larger, high-resolution monitors has increased though, with 20% of the market now using 1920×1080 screens (according to Stat Counter data) so it’s a delicate balance between your photos looking great and also loading as quickly as possible.
Your images can be shown at different sizes on your site, depending on where the image is displayed. With this in mind, I like to upload the maximum size image so that I have more options available which enables me to make it full-screen size in the future if I decide to. It also means that because the photos are larger than what I usually need to display, I’m unlikely to have to go and reupload them in the next couple of years… a huge task if you’re a wedding photographer.
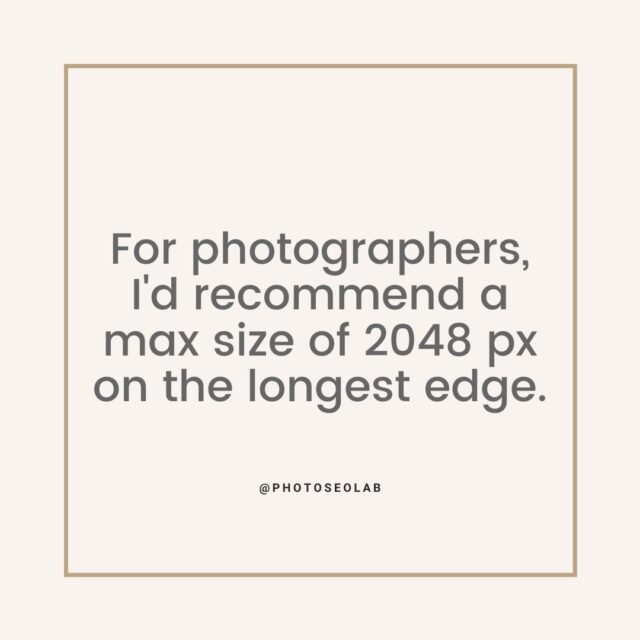
For photographers, where image quality is especially important, I’d recommend uploading a full sized image and instead size photos at a maximum size of 2048 pixels on the longest edge. For non-photography websites, where sharpness in the details may be a bit less critical, 1500 pixels on the longest edge is sufficient. The absolute maximum should be 2560 pixels on the longest edge.
5. Lossless Compression Before Upload
The final step of our image SEO preparation is to losslessly compress the photos before uploading them to the website. There’s a fairly wide selection of software available for this. My personal preference is JPEGmini. This is available as a plug-in for Adobe Lightroom, but I use the standalone app.
Whilst this step is not essential, I like to make the file size as small as possible before I upload images, and this final stage helps avoid uploading files that are larger than they need to be.
Image SEO: On-Page Optimization
6. Image Placement
Now that it’s time to add your photos to a page or post, we need to think about image placement in relation to both user experience and Google’s image best practice guidelines.
Placing images alongside relevant text is an important on page SEO step as it helps user experience in a number of ways. Firstly, text near the image helps provide context so that a user can better understand the story that the photos are part of. Secondly, it helps with overall page experience in relation to speed. You can see this in action by viewing a gallery full of lazy-loading images. Whilst lazy loading does help improve page speed, when scrolling quickly, this can sometimes result in a white page – not good for user experience at all! Splitting the photos into smaller mini-gallery sections helps avoid this phenomenon, as text is significantly faster to load.
7. Make Images Accessible (alt Text and Image Titles)
Adding alt text to every image doesn’t just keep your website compliant for accessibility reasons, it’s also a fantastic way of increasing the visibility of your website and widening the range of searches your post or page can be shown for.
The alt text attributes play an important part in how Google will understand the subject matter. It’s important then to have alt text that is detailed and descriptive of the content of the image and that describes the image subject matter, and is not keyword-stuffed. This blog on alt text best practices goes into the specifics of image alt tags in more detail.
Whilst alt text is more important for accessibility and search engines, having an optimized image title can provide a better user experience, as this text will be visible when a user hovers the cursor over photos. Within WordPress, this image title defaults to the image file name, which is one of the reasons it’s really important to give your photos relevant file names.
A word of caution on background images: image files shown in the CSS will typically not have a visible image alt tag, so this should be avoided where possible. Aim to have all images visible in the HTML code to provide a better user experience for those using screenreaders, and to help Google understand your web pages better. Adding image alt tags is an essential part of compliance with accessibility laws.
Image alt Text Key Takeaways:
- Alt = Alternative
- Used in case the image does not show up
- alt attribute used for blind users with verbal browsers
- Used by Pinterest to auto-populate pin descriptions
- Describe the image to Google
- Describe what’s happening in the image / Sentence fragments are ok
- Describe where the image was taken or is depicting (for local SEO)
- Use your target keywords
- Be clear, descriptive, concise, and not stuffed with keywords
- Ok to duplicate if images are similar
- 100 characters or less
8. Optimise Image Size Displayed
If you uploaded your photos at 1500px or 2048px on the longest edge, they’ll be perfect for displaying full-screen size. The size that photos are shown at will vary though, and there’s usually a range of set sizes that are influenced by your theme design.
To help the page load as fast as possible, it’s best that the image size loaded is the same size as the image size shown on your page. This avoids wasting valuable resources and will improve page speed.
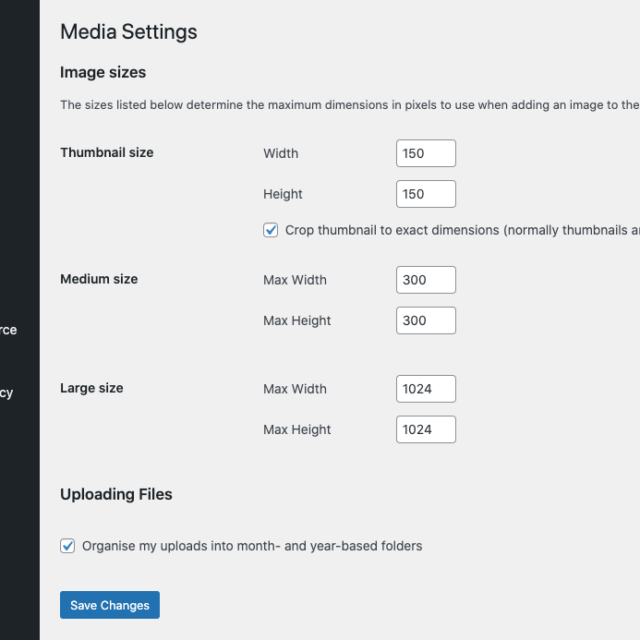
WordPress now defaults to showing blog images at the default ‘large’ size rather than the original image size, as set in the main media settings (pictured).
Using free tools like GTMetrix or Google Lighthouse will help you see if your default WordPress media settings for image sizes are optimal or not.
9. Image Lazy Loading
Lazy loading of images means that the images load as the user scrolls down the page and get close enough to see them. The main benefit of this is that it makes your website load faster as less data needs to be loaded at any one time.
Switching on lazy loading is usually a feature available in your WordPress theme, or cache plugin. A word of caution using this: Whilst this is a great feature, if you’re a wedding photographer with large blocks of photos, using lazy loading can sometimes result in a blank page when a user scrolls – avoid this by following the recommendations in the image placement section above.
It’s best to test this on your website by switching your phone to 4G, and assessing how an image-heavy blog post loads.
10. Image File Format
WebP is a new image format file type, developed by Google, that provides lossless and lossy compression for images on the web. It has many benefits over JPEG, including better quality at smaller file size which makes it faster to load than its counterpart.
WebP is not only better than JPEG, but it also loads faster and offers an even greater compression ratio. WebP images load up to 34% faster than comparable JPEG images. WebP also offers lossless encoding while still providing significant savings in file size, which results in higher quality visual content without sacrificing speed or quality; and WebP is – at time of writing – supported by 79% of browsers today, including both Chrome and Firefox.
Safari does not currently support WebP, so if you intend to use this format on your website, you’ll need a ‘fallback’ option so that JPEGs can be shown if the browser is not WebP friendly.
11. Using srcset Attribute for Responsive Images
What is srcset? This is an attribute that browsers can read that provides images in a variety of sizes, meaning the browser can choose the most optimal one for the circumstances, enabling responsive images required for a fast loading page on any device. The good news is that within WordPress, this is applied to images automatically ensuring you can serve responsive images regardless of theme. so you have one less thing to think about!
12. Image Sitemap
Wondering if you need to create an image sitemap? The good news is, you don’t need an image sitemap. The reason for this is that the Google bot will find your photos through the pages and posts they are attached to. You’d only need image sitemaps if you were wanting to have the individual pages that WordPress creates for each photo to rank, but unless you’d be adding unique text to each of these pages, the approach I would recommend would be to noindex the individual image pages that WordPress creates and to ensure images are excluded from your main website sitemaps.
When one of your photos shows in the image search results, it will provide a far better user experience when on clicking that image, a user is taken to the post or page it’s attached to, rather than the individual WordPress image page, which would typically contain no further information.

13. Image Optimisation Plug-ins for WordPress
There’s lots of choice of WordPress image optimization plugins available, but my go-to is Shortpixel. A few things to mention about Shortpixel: It’s not compatible with Showit websites, and it won’t be compatible if you have Lightspeed hosting, as image optimization is an included feature of that and they won’t play well together.
I have a whole separate blog post on the optimal Shortpixel settings, but I’ll summarise it here by saying remember to ensure you include EXIF data in the settings, otherwise, some of your image SEO optimization preparation efforts will be lost. I also recommend choosing lossless rather than a lower-quality setting for photographers.
14. Image Structured Data
When you feature photos on your posts or pages, Google extracts information about those photos that provide information about the creator and copyright notice.
If you’ve already optimized your image metadata within Lightroom, then there’s no need to add additional image structured data, as Google can recognize and use the IPTC metadata format. Because IPTC metadata can be added in bulk, on import, it’s a far more time-efficient choice.
However, what if you were unaware of fancy things like metadata presets, and you have a website containing maybe hundreds of blogs and thousands of photos… what should you do?
In this scenario, adding image structured data may be a faster option. This would be especially beneficial if your photos were already well optimized with alt text and being shown in the organic search results. Replacing photos can mean they would lose those ranking positions, so a better approach would be adding structured data to the partially performing pages.
Image Structured Data Guides
Google’s Guide to ‘Image License in Google Images’
https://developers.google.com/search/docs/data-types/image-license-metadata#structured-data
Image Rights Metadata in Google Images
https://developers.google.com/search/docs/advanced/appearance/image-rights-metadata
15. Core Web Vitals
Google’s new Core Web Vitals targets should be considered during the image SEO on-page optimization phase, to ensure the overall page performs well.
Some quick wins for optimal performance are avoiding large image sliders/carousel slideshows above the fold of the page, and avoiding an excessive amount of photos.
Non-photographers have a very different idea of what excessive means in relation to image count, but for the wedding photographers reading this, 100 images on a blog post are too many, ok?
Whilst there’s no definitive number I recommend, keep photos to the highlights of the day, and if you need to show multiples of similar bits of the day, consider showing photos like these at a smaller size in a gallery section.
Personally, I aim to keep blog post photos to fewer than 40.
16. Image Optimisation Tools
The final step in on-page image optimization is to use some external tools to assess performance and find further opportunities for further image SEO optimization.
There are many tools currently available for this, but my favorite two are: Google Lighthouse and GTMetrix. I love the waterfall feature of GTMetrix, as it let’s you see clearly if any images are slowing things down. Google Lighthouse will show any issues with image size in relation to Core Web Vitals performance.
Image SEO: Performance Analysis
17. Google Search Console
Google Search Console is going to be the best place to analyze the success of your image SEO optimization work.
Before image SEO improvements are made, I’d recommend exporting a snapshot of the queries a page is being shown for. This then serves as a benchmark to measure improvements.
After your photos have had a full SEO makeover with all of the steps in this guide, I’d expect to see an increase in the range of queries your page was shown for, which would have a positive impact on traffic potential.
18. Google Lighthouse
Google Lighthouse is a free SEO tool from Google which enables you to run page audits to assess the performance of a page.
Lighthouse can be run in Chrome DevTools, and is a fantastic tool to use when assessing page performance.
Lighthouse will show if any of your photos are not sized properly, or if you’ve missed any alt text. I’d recommend using this fantastic tool to identify performance issues and find SEO optimization opportunities with older blog posts or pages.
19. Ahrefs
Ahrefs is a premium SEO software that will, amongst other things, allow you to track the performance of your site against target keyword phrases. Ahrefs shows if pages have attracted any additional SERP features, including photos being shown in the SERPS results. It’s a handy tool to track performance over time so that changes can be monitored, which helps with further optimization decisions.
Image SEO on the Blog
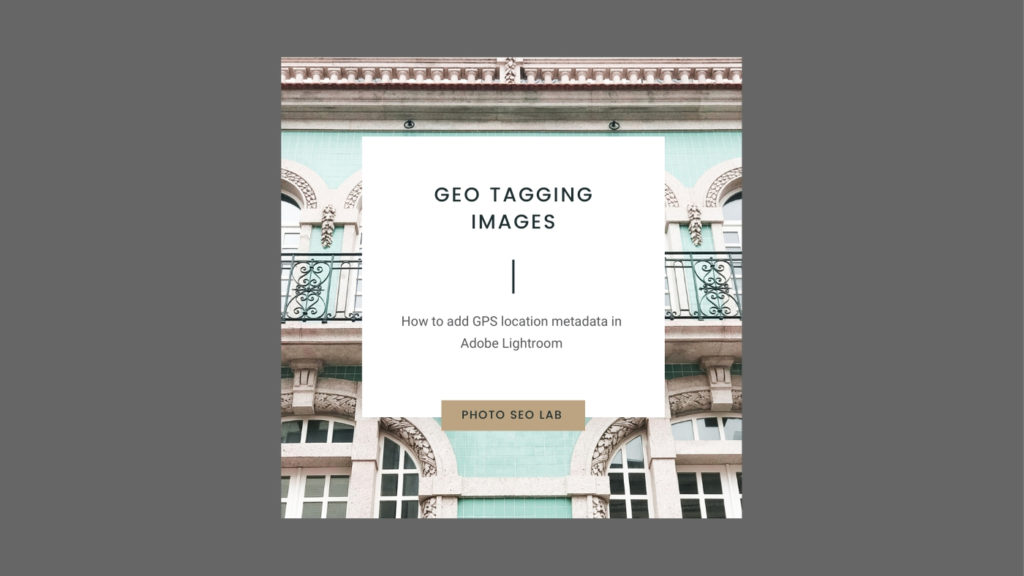

Image SEO Resources
Looking to do more reading on image SEO?
We recommend these resources:
A guide from Google: Google image best practices
Googles SEO starter guide
Ahrefs image SEO guide
Yoast guide: Optimising images for search engines